

In this article we discuss how to create forms using [formGroup] directive. We need to first import “ReactiveFormsModule” from ‘@ang...
Router animation in angular
In this article we discuss how to set-up animation for between two routes. For routing animation we need to implemnt implement in compoent using funct...
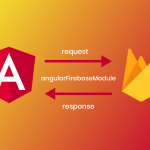
Setup Firebase in angular application
First, we need to create an account of firebase for angular application. You need to go to the firebase.google.com URL and creating an account. After ...
Meta tags in Angular
In this article we discuss how to set the HTML meta tags in our angular apps. To set meta tags we need to import service @angular/platform-brow...
Sharing data between component in Angular
In angular when we need to transmit data from the child component to parent component we can use two methode to transmit. 1) Sharing Data using EventE...
OpenCart SEO URL Plugin
OpenCart SEO URL Plugin lets you generate SEO friendly URLs in a minute. It can generate SEO friendly URLs for products, categories, manufacturers and...
OpenCart Bounce Rate Fixer
OpenCart Bounce Rate Fixer Plugin reduces bounce rate in Google Analytics. With this powerful plugin boost your OpenCart store's SEO ranking. ...
Advance OpenCart SEO Module
Boost your OpenCart store's SEO ranking! Buy Advance OpenCart SEO Module and get free installation and free one year support....
Running CodeIgnitor and WordPress in same root directory
Once we had a situation of running WordPress based site and CodeIgnitor based application in same root directory. The main site was built in WordPress...
OpenCart Shipping Module – Flat Shipping Rates – Slabs
If you charge shipping based on order total or product weight then this module is for you. It supports geo zone. You can configure separate shipping c...